

Creating a farm
New farm asks for three things:- Name — what everyone sees in the farm switcher.
- Slug — the farm’s MQTT identity: devices publish under
flock/<slug>/<device>/<kind>. It’s auto-derived from the name; change it only with care, since deployed devices are configured to publish under it. - Notes — free text.
One farm is included on every plan; creating a second needs the Multiple farms
plan feature (Settings → Billing to upgrade).
The property map
Below the farm table, the map shows the active farm with its boundary, fields, and live sentinel positions.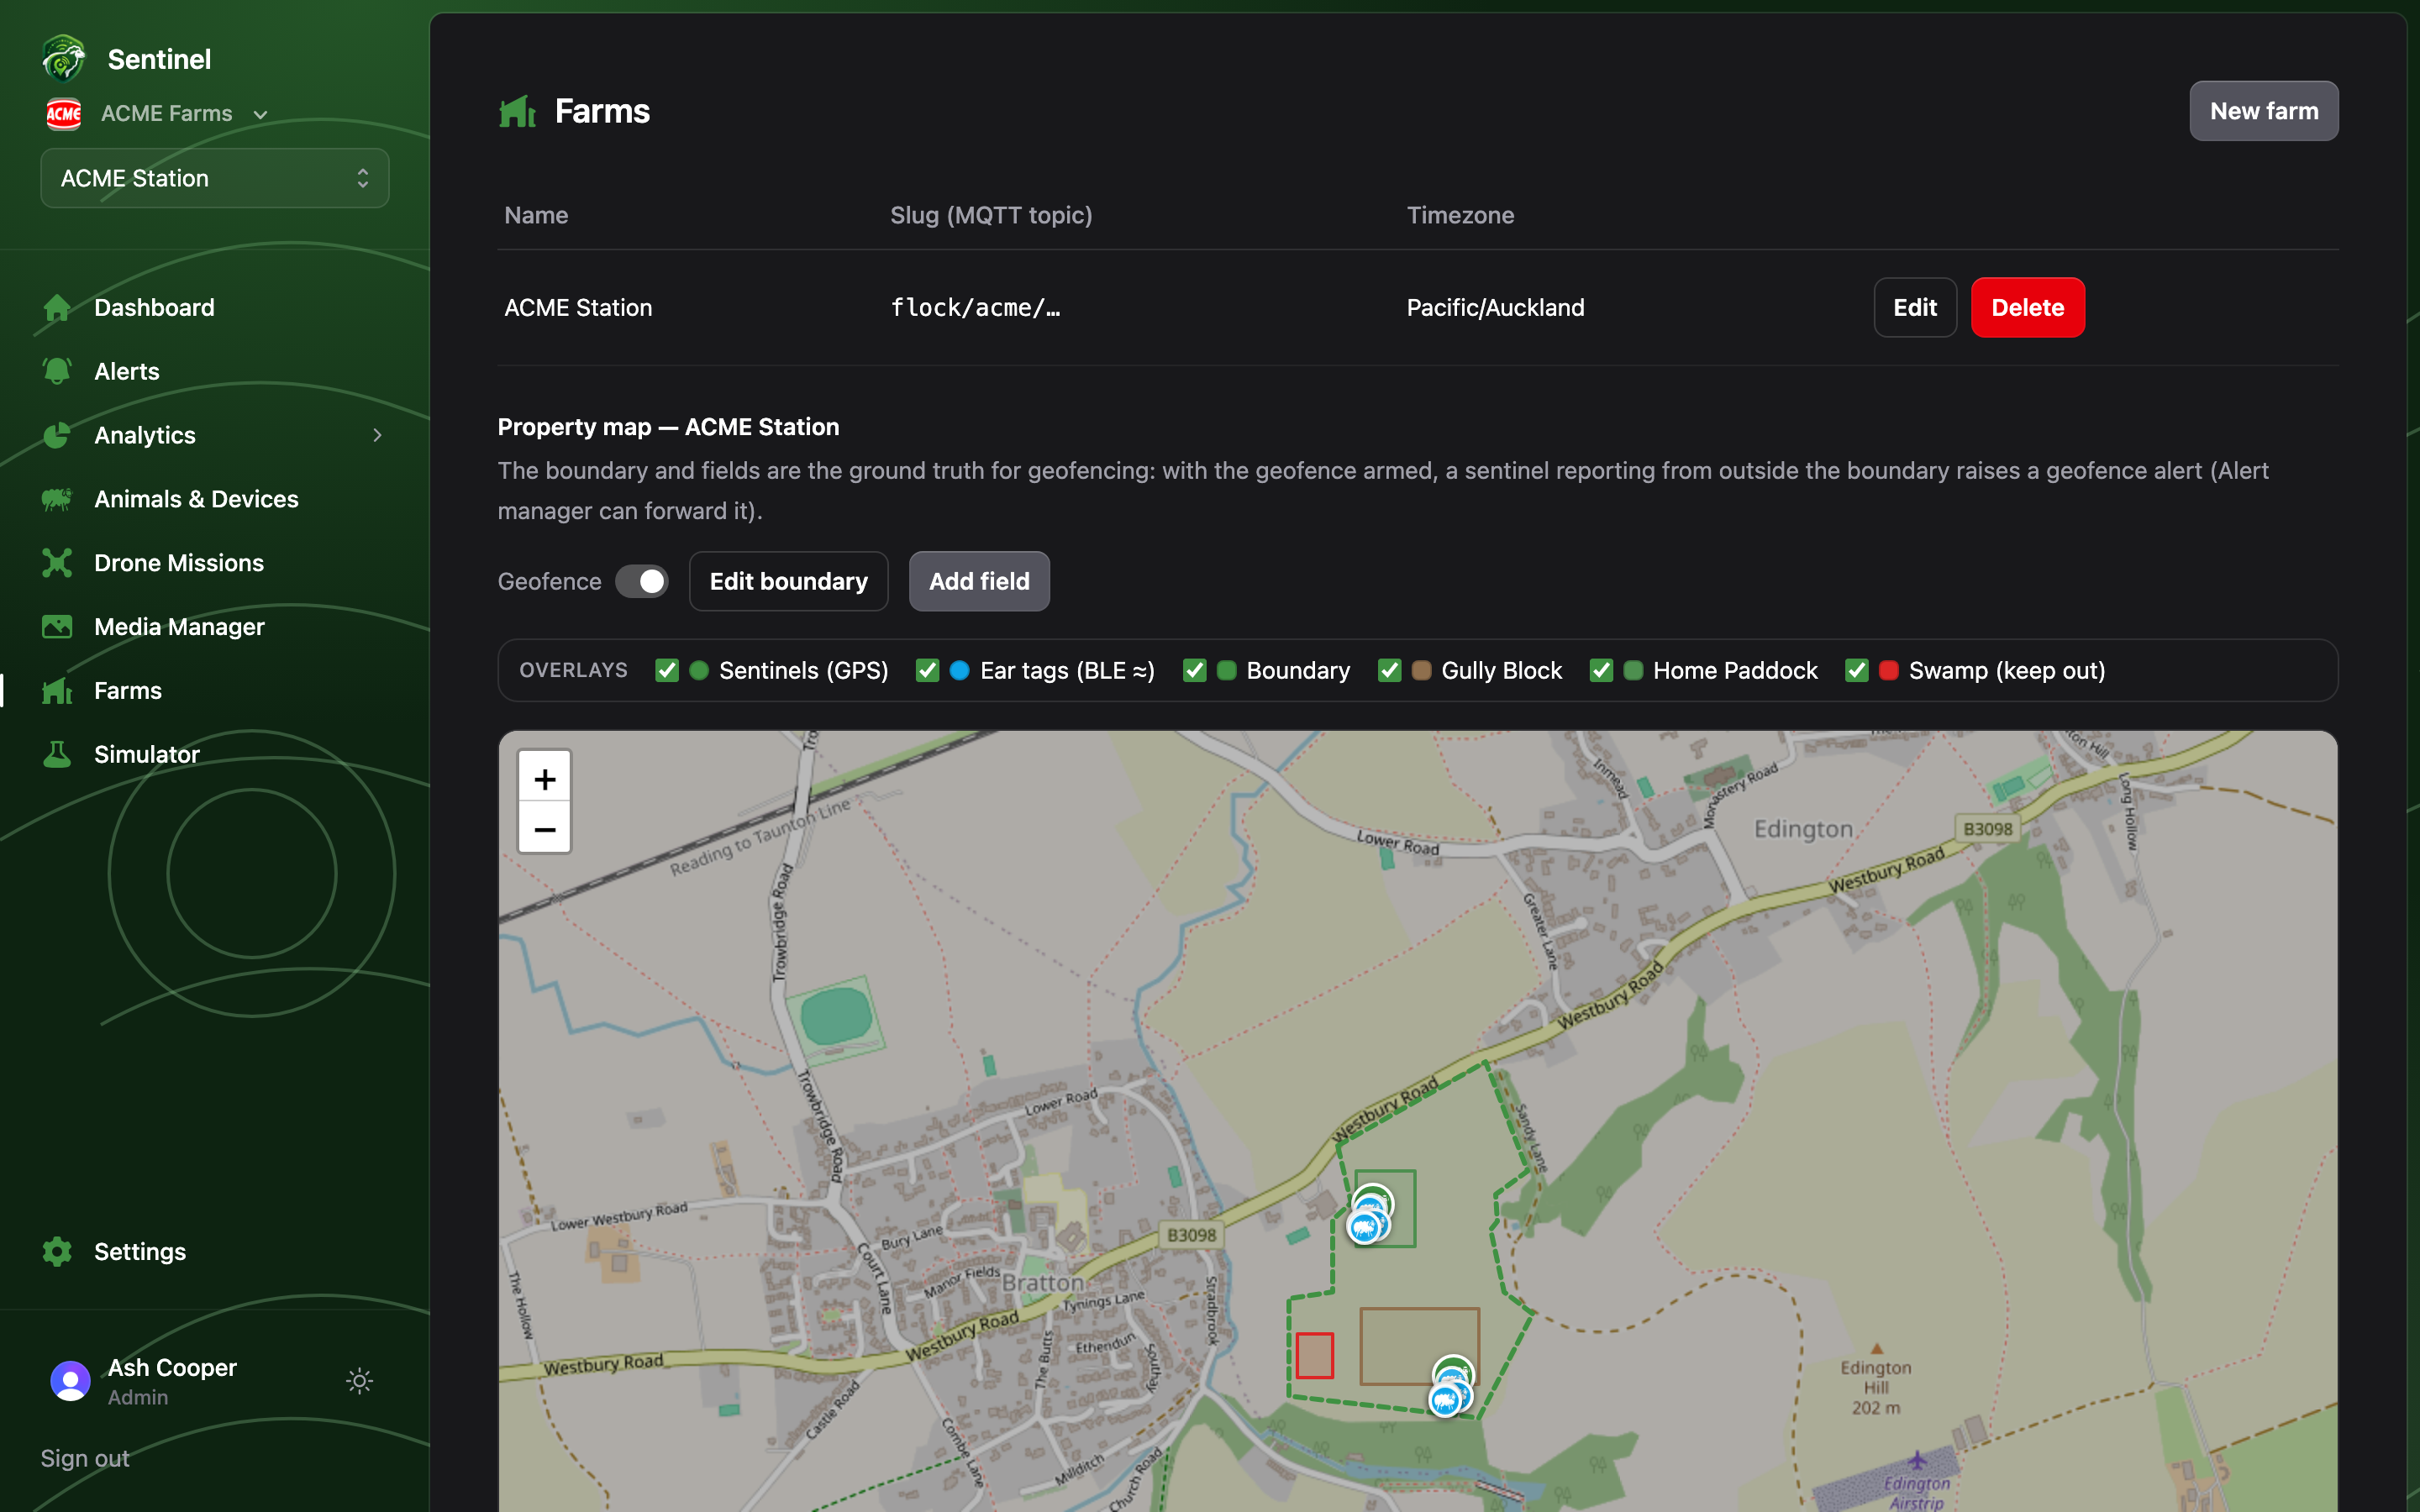
Drawing the boundary
Draw boundary starts click-to-draw: click the map to add corners, drag the handles to adjust, Finish (three or more points) to save. The boundary is the ground truth for geofencing — until one exists, the Geofence switch stays disabled and the page shows an amber prompt.Fields
Add field works the same way, with a name and a kind — Paddock, Exclusion zone, Yards, or Other. Fields are display and analytics geometry (overlays, grazing pressure, simulator areas); they don’t arm the geofence. Each field row offers Edit shape, a colour swatch picker for the map, and delete.Arming the geofence
With a boundary saved, flip the Geofence switch: any sentinel reporting from outside the boundary raises ageofence alert — which the
Alert Manager can forward like any other event.